
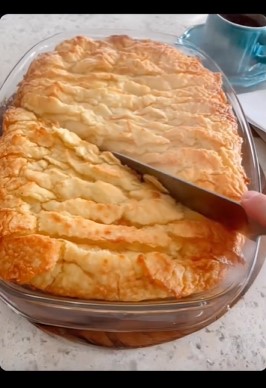
Ingredients and Smart Substitutes
Here is exactly what you need to pull off this decadent treat. I’ve kept the list beautifully minimal, but I’ve also included a few clever swaps based on what you might already have in your pantry.
The Core Five:
- 1 box (15.25 oz) chocolate cake mix: Devil’s food or dark chocolate works best for a rich, deep flavor. Substitute: If you prefer a lighter, sweeter cake, a standard milk chocolate mix works perfectly, too.
- 1 box (3.9 oz) instant chocolate pudding mix: This is the absolute secret weapon! It adds moisture and creates the structural tension needed for that signature crackly top. Substitute: Vanilla instant pudding mix if you want a slightly sweeter, more subtle chocolate flavor. (Crucial Note: Do not use “cook-and-serve” pudding; it must be instant).
- 4 large eggs: These provide the structure, lift, and richness. Substitute: If you are out of eggs, you can use 1 cup of unsweetened applesauce or a commercial egg replacer equivalent to 4 eggs, though the texture will be slightly more dense and cake-like.
- ½ cup vegetable oil: This keeps the cake incredibly moist and tender. Substitute: Melted and slightly cooled butter or canola oil. Butter will give it a richer, more homemade flavor.
- 2 to 3 tablespoons powdered sugar: For a delicate, snowy dusting on top once the cake has cooled. Substitute: A light dusting of cocoa powder or a simple vanilla glaze.
Step-by-Step Instructions
Grab your favorite 9×13-inch metal baking pan and a large mixing bowl. Let’s make some magic!
Step 1: Prep the Pan and Oven Preheat your oven to 350°F (175°C). Lightly grease your 9×13-inch baking pan with butter or non-stick cooking spray. For absolute peace of mind and easy cleanup, you can also line the bottom with a sheet of parchment paper, leaving a slight overhang to use as “handles” later.
Step 2: The “Dump and Mix” Method In your large mixing bowl, combine the dry chocolate cake mix and the dry instant chocolate pudding mix. Give them a quick whisk to break up any stubborn clumps and ensure the leavening agents are evenly distributed.
Step 3: Add the Wet Ingredients Crack the four eggs into the bowl and pour in the vegetable oil. Using a hand mixer or a sturdy wooden spoon, beat the mixture on medium speed for about 2 minutes. The batter will be very thick, almost like a brownie batter, and glossy. This is exactly how it should look! Do not overmix, or the cake can become tough.
Step 4: Bake to Crinkle Perfection Spread the thick batter evenly into your prepared baking pan. Use a spatula to smooth the top as best as you can. Bake for 35 to 40 minutes. Keep an eye on it through the oven door—you will actually see the top crack and crinkle as it bakes. That’s the magic happening!
Step 5: The Toothpick Test Insert a wooden toothpick into the center of the cake. It should come out with a few moist crumbs attached, but no wet, raw batter. If it’s still wet, give it another 3 to 5 minutes in the oven.
Step 6: Cool Completely (Crucial Step!) This is the hardest part, but you must let the cake cool completely in the pan on a wire rack. As the cake cools, the top will set, contract slightly, and the beautiful crinkle pattern will fully form and lock into place. Once completely cool, dust lightly with powdered sugar right before slicing.
Pro-Tips for the Best Results
- Don’t skip the instant pudding: The modified food starch in the instant pudding is what creates the structural integrity for that crackly top. Skipping it will result in a standard, flat cake.
- Use a metal pan: Glass or ceramic baking dishes retain heat differently and can cause the edges to bake too quickly before the center sets, which can ruin the crinkle effect. A standard metal 9×13 pan is your best bet for even baking.
- Room temperature eggs: If you have the time, let your eggs sit on the counter for 15 minutes before mixing. They will incorporate into the thick, oily batter much more smoothly, preventing lumps.
Fun Variations and Serving Ideas
Want to customize this simple dessert to fit the occasion? Here are a few fuss-free ways to make it your own:
- The Peanut Butter Swirl: Before baking, drop spoonfuls of creamy peanut butter onto the batter and gently swirl it with a butter knife. The chocolate-peanut butter combination is an absolute, undeniable crowd-pleaser.
- The Mint Chocolate Upgrade: Fold ½ cup of mini chocolate chips and ½ teaspoon of peppermint extract into the batter for a festive, refreshing twist that tastes like a holiday treat.
- The Lemon Crinkle Cake: Swap the chocolate cake mix for a yellow or lemon cake mix, and use vanilla instant pudding. It creates a bright, sunny, citrusy cake with the same gorgeous crackled top.
- Serving Suggestions: Serve a room-temperature slice with a scoop of vanilla bean ice cream or a dollop of fresh whipped cream. The contrast of the fudgy cake and the cold cream is pure, nostalgic comfort.
Frequently Asked Questions
Can I use a different flavor of cake mix? Absolutely! As mentioned, yellow cake mix paired with vanilla pudding creates a delicious “Golden Crinkle Cake.” You can also use strawberry cake mix with white chocolate pudding for a fun, fruity variation.
Why didn’t my cake crinkle? The crinkle effect usually fails for one of two reasons: either the batter was overmixed (making it too dense to crack properly), or the cake was underbaked. Make sure to bake it until a toothpick comes out with moist crumbs, and let it cool completely before cutting.
Can I make this in a Bundt pan? Yes, but the crinkle effect is most visible on a flat, wide surface. If you use a 10-cup Bundt pan, the baking time will increase to about 45–55 minutes. It will still taste amazing, but it will look more like a traditional pound cake.
How should I store leftovers? Because of the pudding and oil, this cake stays wonderfully moist at room temperature. Store it in an airtight container or tightly covered with plastic wrap for up to 4 days. You can also freeze individual slices, wrapped tightly in plastic and foil, for up to 2 months!
Let’s Get Baking!
There is something deeply satisfying about pulling a simple, humble dessert out of the oven and knowing it’s going to bring smiles to the faces of your family, friends, or neighbors. It’s the kind of resourceful, fuss-free cooking that proves you don’t need a long list of expensive ingredients to create something truly special.
I truly hope this Chocolate Crinkle Cake becomes a reliable, comforting staple in your kitchen. If you try this recipe, I would absolutely love to hear how it turned out! Did you add a peanut butter swirl? Did you bring it to a potluck? Drop a comment below to let me know, and don’t forget to share this recipe with a friend who loves an easy, crowd-pleasing dessert. Happy baking!